Installing Windows on a new PC is an important step before you can start using your computer for work, study, gaming, or everyday tasks. If your computer does not have an operating system installed, you can install Windows using a bootable USB drive.
The process involves preparing a Windows installation USB, starting your computer from the USB drive, following the Windows Setup instructions, and completing the initial configuration. This guide explains how to install Windows on a new PC step by step, even if you are doing it for the first time.
Before starting, make sure your PC meets the requirements for your chosen Windows version. You will also need a USB flash drive with at least 8 GB of storage and access to another working computer to create the installation media.
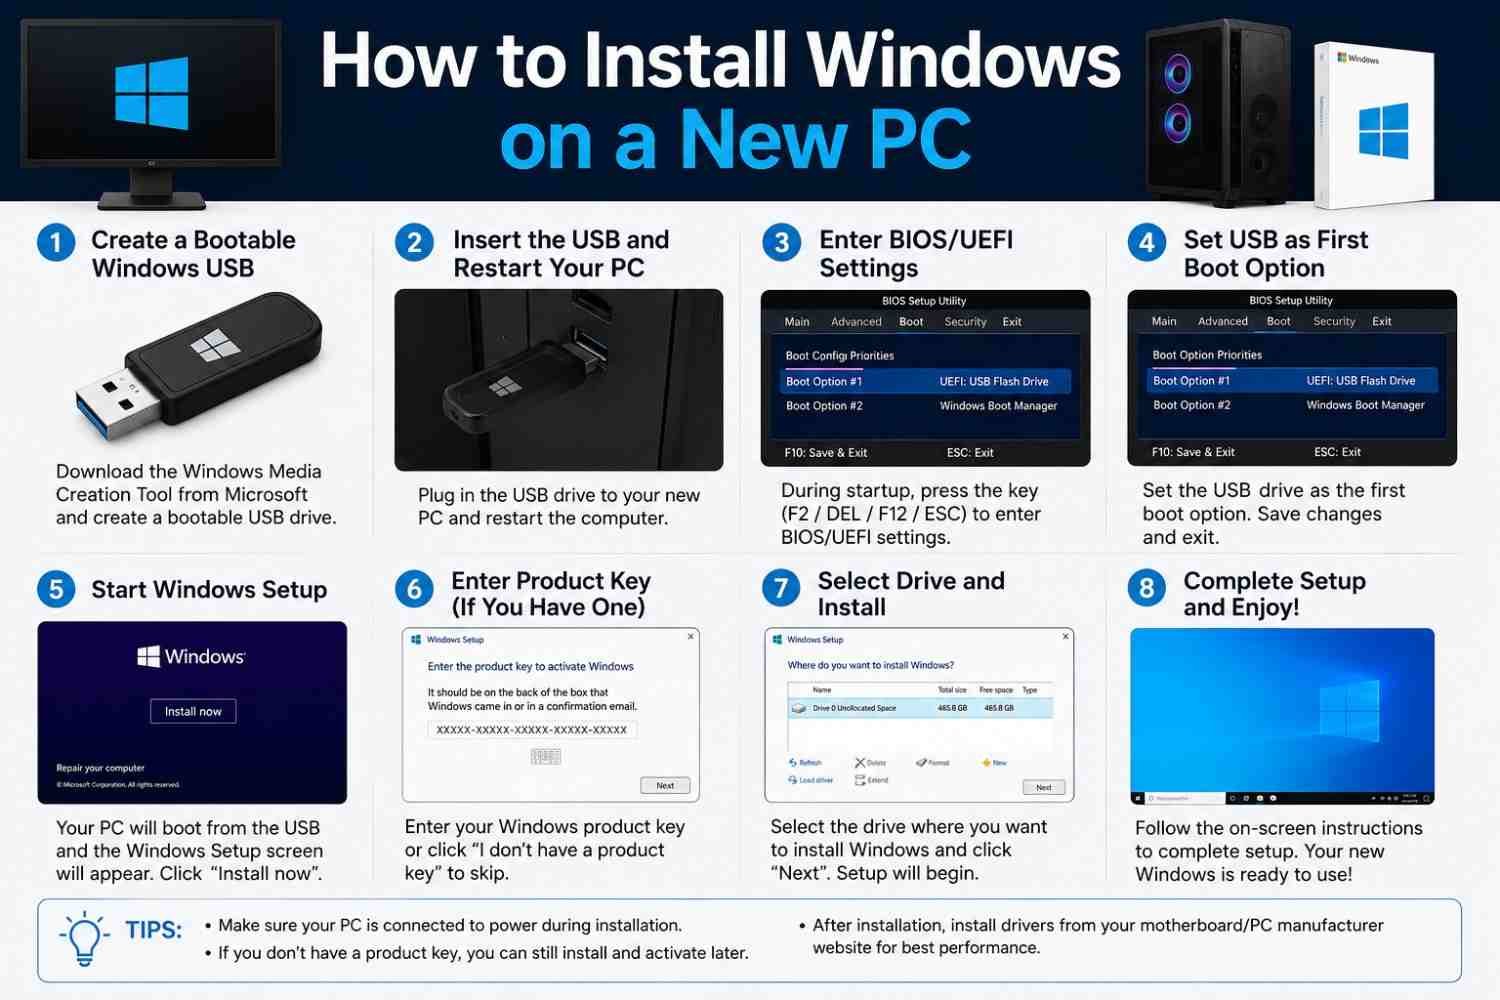
What You Need Before Installing Windows
Before installing Windows, prepare everything you need to complete the process smoothly.
Here is a checklist:
- A new PC: Make sure your computer is compatible with the Windows version you want to install.
- A USB flash drive: Use a USB drive with at least 8 GB of storage.
- A working computer: You need another computer with internet access to prepare the installation USB if your new PC has no operating system.
- Windows installation media: Prepare the installation USB using Microsoft’s official tools.
- A Windows license: You may need a valid product key or digital license to activate Windows.
- An internet connection: Internet access helps you complete setup, download updates, and install drivers.
If you plan to install Windows 11, check the official system requirements before starting. These include a compatible processor, sufficient memory and storage, UEFI firmware, Secure Boot capability, and TPM 2.0.
Create a Bootable Windows Installation USB
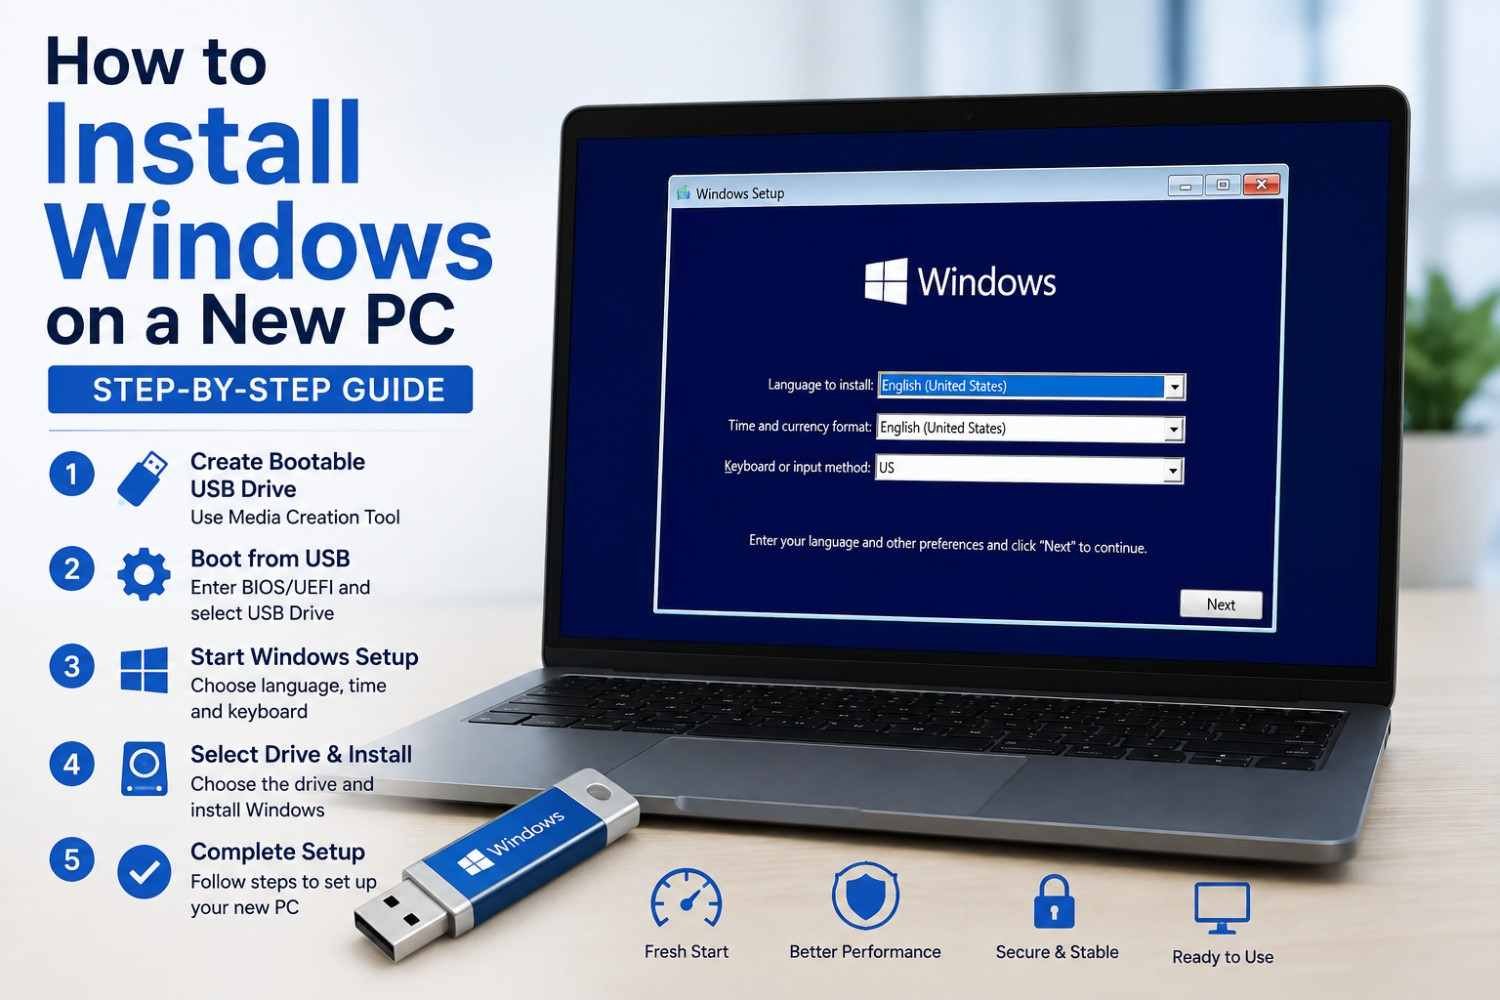
The first step is to create a bootable USB drive containing the Windows installation files. This USB drive will allow your new PC to start the Windows installation process.
To create a bootable USB drive, follow Microsoft’s official guide to creating Windows installation media.
Follow these steps:
- Open Microsoft’s official Windows download website on a working computer.
- Select the Windows version you want to install.
- Download the appropriate Windows installation media tool, if available for your chosen version.
- Connect your USB flash drive to the computer.
- Run the downloaded tool and follow the on-screen instructions.
- Select the USB flash drive as the destination.
- Wait for the tool to download and prepare the installation files.
- Safely eject the USB drive when the process is complete.
Important: Creating installation media may erase the existing contents of the USB drive. Back up any important files before you begin.
Start the New PC From the USB Drive
After creating the bootable USB, connect it to your new PC. You must start the computer from this USB drive to open Windows Setup.
Follow these steps:
- Turn off your new PC.
- Insert the bootable Windows USB drive.
- Turn on the computer or restart it.
- Open the boot menu or BIOS/UEFI settings using the key specified by your PC manufacturer.
- Common keys include F12, F11, F9, Esc, or Delete, depending on the computer model.
- Select the USB drive from the available boot devices.
- Press Enter to continue.
Your PC should now load the Windows installation screen.
If the USB drive does not appear, check the manufacturer’s instructions and confirm that the USB installation media was created correctly.
Start Windows Setup
Once your computer starts from the USB drive, the Windows Setup screen should appear.
Follow these instructions:
- Select your preferred language.
- Choose your time and currency format.
- Select your keyboard layout.
- Click Next.
- Click Install now.
Windows Setup may ask you to enter a product key. If you have one, enter it when prompted. Depending on your Windows version and license, you may be able to continue and activate Windows later.
Choose the Windows edition that matches your license. Selecting the wrong edition may cause activation problems.
Choose the Installation Type and Drive
After starting Windows Setup, you may be asked which type of installation you want.
For a new PC without an existing operating system, the custom installation option is generally appropriate.
Follow these steps:
- Read the installation options carefully.
- Select Custom if you are performing a clean installation.
- Review the available drives and partitions.
- Select the intended drive or unallocated space where you want Windows installed.
- Continue by following the instructions on the screen.
Important: Be careful when selecting drives and partitions. Formatting or deleting a partition can permanently remove its data. If your computer contains files you need, stop and make sure they are backed up before proceeding.
If you are unsure which drive to select, check your PC manufacturer’s instructions before making changes.
Complete the Windows Installation
After selecting the installation drive, Windows will begin copying and preparing files.
During this process:
- Windows copies the required installation files.
- The computer may restart several times.
- Windows completes the installation automatically.
- Additional setup screens may appear.
Keep your computer connected to a reliable power source during installation. Do not turn it off while Windows is installing.
If the computer returns to the USB installer after restarting, remove the USB drive when appropriate or select the internal drive from the boot menu.
When the installation is complete, Windows will guide you through the initial setup.
Set Up Windows After Installation
After Windows has been installed, you need to configure some basic settings before using your PC.
Follow the on-screen instructions to:
- Select your country or region.
- Choose your keyboard layout.
- Connect to a network if required.
- Set up your Microsoft account or another supported account option.
- Review the privacy settings.
- Complete any remaining setup instructions.
The available options may vary depending on your Windows version.
Once you reach the desktop, check that your keyboard, mouse, display, Wi-Fi, and other hardware components are working correctly.
After setting up your PC, you can also follow these Windows 11 optimization tips to improve system performance.
Activate and Update Windows
After completing the initial setup, check your Windows activation status and install available updates.
Check Windows Activation
To check activation:
- Open Settings.
- Select System.
- Open Activation.
- Review the activation status.
- Follow the instructions if activation is required.
You may need a valid product key or digital license. Activation requirements depend on your Windows edition and license.
Once your updates and drivers are installed, you can learn how to make Windows 11 faster with additional performance tips.
Install Windows Updates
To check for updates:
- Open Settings.
- Select Windows Update.
- Click Check for updates.
- Install the available updates.
- Restart your computer if requested.
You should also check for drivers for your graphics card, motherboard, Wi-Fi adapter, audio device, and other hardware. Use Windows Update or the official support website of your hardware manufacturer to obtain compatible drivers.
Common Problems When Installing Windows on a New PC
Sometimes, Windows installation may not work as expected. Here are a few common problems and their possible solutions.
USB Drive Does Not Appear in the Boot Menu
Make sure the USB drive is connected properly and was created using the correct Windows installation files. Check your PC manufacturer’s instructions for opening the boot menu.
PC Does Not Meet Windows 11 Requirements
Check the official Windows 11 system requirements and confirm that your hardware and firmware settings are supported. Do not change security settings without understanding their purpose.
Windows Cannot Find the Installation Drive
The drive may not be detected because of a storage configuration or missing compatible driver. Check your computer manufacturer’s documentation before changing BIOS/UEFI or storage settings.
Windows Does Not Activate
Check that you installed the correct Windows edition and that your product key or digital license is valid for that edition. Follow the activation instructions shown in Settings.
After installing Windows, you can also learn how to clean Windows 11 to remove unnecessary files and free up storage space.
Frequently Asked Questions
1. What Do I Need to Install Windows on a New PC?
You need a compatible PC, a USB flash drive with at least 8 GB of storage, Windows installation media, and a working computer with internet access to prepare the USB drive. A valid Windows license may also be required for activation.
2. How Do I Install Windows on a New PC Without an Operating System?
Create a bootable Windows installation USB using a working computer. Insert it into your new PC, start the computer from the USB drive, follow Windows Setup, select the correct installation drive, and complete the setup instructions.
3. How Long Does It Take to Install Windows on a New PC?
Installation time depends on your computer’s hardware, USB drive speed, Windows version, and internet connection. Allow extra time for initial setup, updates, and driver installation.
4. Do I Need a Product Key to Install Windows?
You may be able to begin installation without entering a product key, depending on the Windows version and setup options. However, activation requires an eligible license, such as a valid product key or digital license.
5. What Should I Do After Installing Windows?
Complete the initial setup, check activation, install Windows updates, verify your drivers, and confirm that your hardware is working correctly. You can then install the applications you need.
Conclusion
Installing Windows on a new PC becomes easier when you prepare everything in advance and follow each step carefully. Start by checking your computer’s requirements and creating a bootable USB drive. Then start your PC from the USB, follow Windows Setup, select the correct installation drive, and complete the installation.
After Windows is installed, configure your settings, check activation, install updates, and make sure your hardware drivers are working correctly. By following this step-by-step guide, you can prepare your new PC for everyday use./km